 how-to
7 Steps to Dial In Espresso Shots at Home
Last Updated: October 24, 2026
Quick Summary
To dial in espresso shots, adjust your machine's grind size, dose, and tamp pressure until each shot pulls in 25-30 seconds and tastes balanced. Start with a baseline grind setting, pull test shots, and make small adjustments one variable at a time until you find the sweet spot.
- Standard espresso dose is 18-20 grams for a double basket, weighed consistently on a scale
- Ideal shot time is 25-30 seconds, with too-fast shots under 20 seconds tasting sour and too-slow shots over 35 seconds tasting bitter
- Start with a 1:2 brew ratio (18 grams in, 36 grams out) as the most forgiving baseline for beginners
- Change only one variable per shot and pull at least three shots at the same setting before adjusting again
- Track your grind setting, shot time, output weight, and taste notes in a chart to identify patterns
Table of Contents
- What It Means to Dial In Espresso Shots
- Understanding Espresso Grind Size and Its Impact
- Finding Your Ideal Espresso Brew Ratio
- The Step-by-Step Process to Dial In Your Machine
- Using an Espresso Dialing In Chart to Track Changes
- How to Fix Sour Espresso and Other Common Problems
- Common Mistakes to Avoid When Dialing In
- Getting Started with Your First Dial-In Session
- Frequently Asked Questions
What It Means to Dial In Espresso Shots
Learning how to dial in espresso shots means adjusting your machine's settings so each shot pulls consistently and tastes balanced.
When you dial in, you're solving a puzzle. Every variable affects the shot. Change one thing and the whole result shifts. The difference between a mediocre shot and a café-quality one often comes down to dialing in properly.
At Modesto & Associates, we work with customers who want café-standard espresso at home. Dialing in is the foundation. Without it, even the best machine produces inconsistent results. With it, you unlock what your equipment can actually do.
Think of dialing in as calibration. A scale needs calibration. A thermometer needs calibration. Your espresso machine needs it too. You're not guessing anymore, you're measuring and adjusting until everything works.
Understanding Espresso Grind Size and Its Impact
Espresso grind size is how fine or coarse you grind your beans before dosing the portafilter. It's the single biggest lever you have when dialing in.
Grind size controls how fast water flows through the puck. Finer grinds slow the flow. Coarser grinds speed it up. This matters because flow time determines extraction, and extraction determines flavor.
Here's what happens at each end:
- Too coarse: Water rushes through. The shot pulls fast (under 20 seconds). Flavors don't have time to dissolve. You get sour, thin, weak shots.
- Too fine: Water moves slowly. The shot pulls long (over 35 seconds). Over-extraction happens. Flavors become bitter and harsh.
- Just right: Water flows at the right pace (25-30 seconds). Flavors extract evenly. You get balanced, sweet, complex shots.
Most grinders let you adjust in small increments. Start with a medium setting and move from there. Small adjustments matter. A tiny turn of the dial can change your shot dramatically.
Finding Your Ideal Espresso Brew Ratio
Espresso brew ratio is the relationship between dry coffee weight going in and liquid espresso weight coming out. It's written as a ratio like 1:2 or 1:2.5.
A 1:2 ratio means: 18 grams in, 36 grams out. A 1:2.5 ratio means: 18 grams in, 45 grams out.
Different ratios produce different flavors:
- 1:1.5 to 1:2 (ristretto/shorter shots): Intense, concentrated, bold. Less water means less extraction time. You get sweetness and body but less complexity.
- 1:2 to 1:2.5 (regular/lungo shots): Balanced, full-bodied, complex. More water means more extraction. You get depth and nuance.
- 1:2.5+ (long shots): Lighter, more acidic, sometimes thin. Too much water over-extracts and pulls out unpleasant flavors.
Start with 1:2. It's the most forgiving ratio for beginners. Dial your grind size to hit that ratio, and you'll have a solid baseline to work from. Once you're comfortable, experiment with 1:2.2 or 1:2.3 to find your preference.
The Step-by-Step Process to Dial In Your Machine
Dialing in follows a logical sequence. Each step builds on the last. Rushing through or skipping steps wastes time and beans.
Step 1: Start with a baseline grind setting
Choose a grind size to start. If your grinder has numbered settings, pick the middle. If it's a dial, aim for medium-fine.
Pull a test shot without worrying about the result. This shot tells you where you are. Write down the grind setting number so you can track changes.
Step 2: Dose your portafilter consistently
Use a scale to weigh your coffee. Standard doses are 18-20 grams for a double basket. Consistency matters more than the exact number.
Weigh the same amount every time you dial in. This removes one variable so you can focus on grind size.
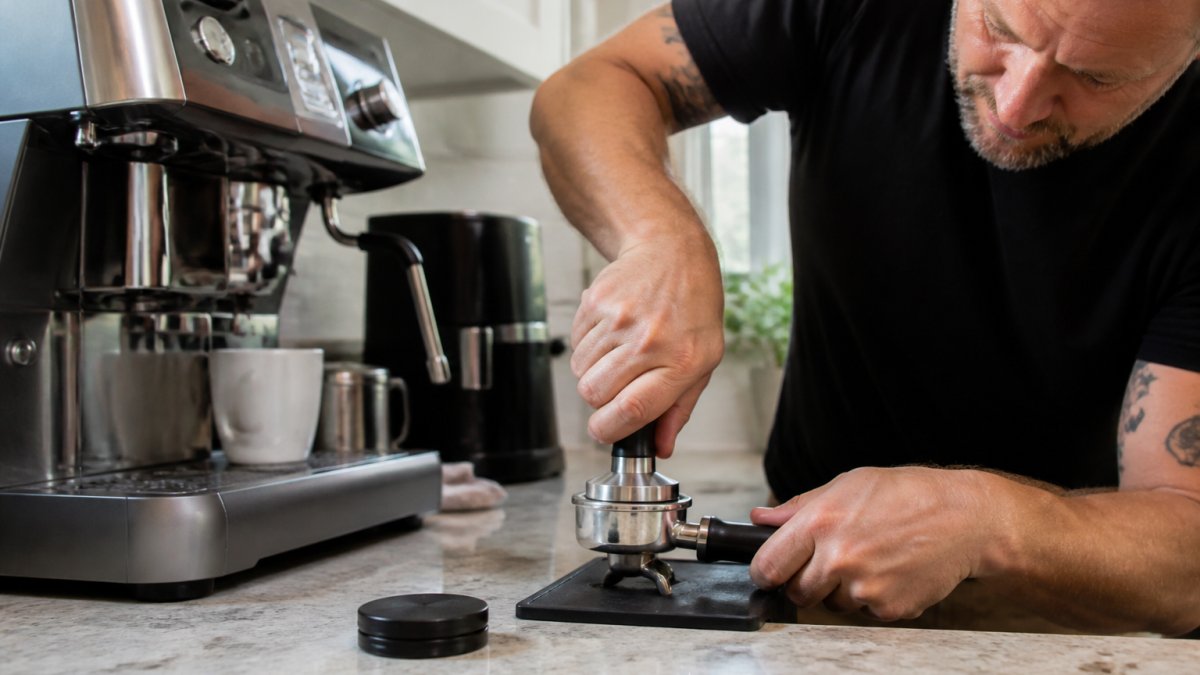
Step 3: Tamp with even pressure
Tamp straight down. Apply firm, steady pressure. Aim for about 30 pounds of force, enough to compress the puck but not so hard you strain.
The tamp should be level. A tilted tamp creates uneven extraction. If you're new to this, a tamper with a level base helps.
Step 4: Pull your first test shot
Start the timer as water begins flowing. Watch the shot pull into your cup.
Note three things: the time it takes (how many seconds until you reach your target weight), the color (dark blonde to brown is good), and the flow (steady stream or spurting).
Step 5: Adjust based on shot time and appearance
If your shot pulls in under 20 seconds, grind finer. The puck needs more resistance.
If your shot takes over 35 seconds, grind coarser. Water is moving too slowly.
Pull another shot with the new setting. Compare it to the last one. Adjust again if needed. Most shots need 2-4 adjustments before you hit the sweet spot.
Using an Espresso Dialing In Chart to Track Changes
A simple chart keeps you organized and shows patterns.
| Grind Setting | Shot Time (seconds) | Weight Out (grams) | Ratio | Taste Notes |
|---|---|---|---|---|
| 5 | 18 | 36 | 1:2 | Sour, thin |
| 6 | 24 | 36 | 1:2 | Balanced, sweet |
| 7 | 32 | 36 | 1:2 | Bitter, harsh |
Write down each attempt. Include the grind number, shot time, output weight, and how it tasted. After 5-10 pulls, you'll see the pattern. You'll know exactly which setting produces the flavor you want.
This chart becomes your reference. Come back to it when you change beans or want to dial in again.
How to Fix Sour Espresso and Other Common Problems
Most dialing-in problems fall into three categories. Identify which one you have, and the fix becomes obvious.
Sour shots: underextraction and fast flow
Sour espresso tastes sharp and acidic. It lacks sweetness and body. The shot pulls fast, usually under 25 seconds.
Why it happens: The grind is too coarse. Water rushes through without extracting enough flavor compounds.
The fix: Grind finer. Make a small adjustment and pull another shot. Keep adjusting finer until the shot time reaches 25-30 seconds. Sour shots disappear when extraction time increases.
What to watch: Don't grind so fine that the shot chokes and stops flowing. Finer is better than coarser for sour shots, but there's a limit.
Bitter shots: overextraction and slow flow
Bitter espresso tastes harsh and burnt. It lacks sweetness. The shot pulls slow, usually over 35 seconds.
Why it happens: The grind is too fine. Water moves too slowly and pulls out harsh, unpleasant flavors.
The fix: Grind coarser. Make a small adjustment and pull another shot. Keep adjusting coarser until the shot time drops to 25-30 seconds. Bitter shots improve as extraction time decreases.
What to watch: Don't grind so coarse that the shot pulls too fast and becomes sour again. You're finding the middle ground.
Channeling and uneven extraction
Channeling happens when water finds a path of least resistance through the puck. Part of the coffee extracts too fast, and the rest barely extracts at all. The shot tastes uneven, some sips are sour, others bitter.
Why it happens: Uneven tamping, inconsistent dose, or a damaged basket.
The fix: Check your tamping. Make sure you're pressing straight down with even pressure. Weigh your dose again to confirm consistency. If both are solid, the basket might be damaged. Replace it if needed.
You can also explore detailed fixes for bitter shots to understand extraction problems more deeply.
Common Mistakes to Avoid When Dialing In
Most people make the same errors. Knowing them saves time and frustration.
Changing too many variables at once: You adjust grind size, dose, and tamp pressure all in one shot. Now you don't know which change caused the result. Change one variable per shot. See the effect.
Not using a scale: You eyeball the dose, guessing at grams. One shot has 17 grams, the next has 19. Your results are inconsistent and confusing. A cheap scale costs little and solves this completely.
Pulling only one or two shots before deciding: One bad pull doesn't mean your settings are wrong. Pull at least three shots at the same setting before moving on. Consistency matters more than a single result.
Ignoring the shot time: You focus only on taste and ignore how long the shot takes. Shot time is your most objective measure. Use it.
Grinding too fine out of habit: Many home baristas default to fine grinds. They think finer means better extraction. Often it just means choking the machine and creating frustration. Start medium and adjust from there.
Getting Started with Your First Dial-In Session
Your first session should take 30-45 minutes. Don't rush.
Gather what you need: your espresso machine, a grinder, a scale, a timer, and a cup or shot glass. Have 50-75 grams of fresh beans ready.
Start with a baseline grind setting. Pull your first shot and time it. Write down what you see. Pull a second shot with a small grind adjustment.
By pull five or six, you'll start seeing patterns. One setting will pull faster, another slower. One will taste sour, another bitter.
After 8-10 pulls, you'll likely have a setting that works. The shot pulls in 25-30 seconds. It tastes balanced. It's sweet, not sour or bitter. That's your dial-in point.
Use our guide to choosing a home espresso machine if you're still setting up your equipment. And explore home barista essentials for small kitchens to make sure you have the right tools for consistent dialing in.
Once you dial in, write down your settings. Next time you use the machine, start with those numbers. You'll pull good shots immediately instead of starting from scratch.
Dialing in espresso shots takes practice, but it's worth the effort. Your morning coffee transforms from inconsistent and frustrating to reliable and delicious.
Frequently Asked Questions
What does it mean to dial in an espresso shot?
Dialing in espresso shots means adjusting your grinder settings, dose, and tamping technique to pull shots that taste balanced and extract properly. You're finding the right combination of grind size, coffee amount, and pressure so that water flows through the puck at the correct speed, typically 25 to 30 seconds for a double shot, and produces a shot with good body and flavor rather than tasting sour or bitter.
What is a good starting espresso brew ratio?
A common starting point is a 1:2 ratio: 18 grams of coffee in yields 36 grams out. This ratio works well for most coffee styles and machines. If that produces a shot that's too slow or too fast, adjust your grind size first before changing the ratio. Some prefer 1:2.5 or 1:3 ratios depending on the coffee bean and desired strength, but 1:2 is a reliable baseline for dialing in espresso at home.
How do I fix espresso that tastes sour?
Sour espresso usually means underextraction: the water flowed through too quickly. Make your grind finer to slow the flow, or increase your dose slightly. Pull another test shot and check the time, aim for 25 to 30 seconds. If the shot still tastes sour after grinding finer, your coffee may be too fresh (less than 5 days from roast) or the beans themselves may not suit your machine. Consistency matters: use the same grind and dose for multiple shots before adjusting again.
How often should I dial in my espresso machine?
Dial in when you open a fresh bag of beans, since different roasts and origins extract differently. You may also need to adjust slightly as beans age over 2-3 weeks. If you're using the same beans and haven't changed anything, your dial-in should hold for weeks. Super-automatic machines require less frequent adjustment than manual machines, but always pull a test shot with new coffee before serving guests to ensure consistency.