 how-to
How to Froth Milk to 160 Degrees for Silky Microfoam
Last Updated: November 1, 2026
Quick Summary
To froth milk to 160 degrees, chill the milk and pitcher, position the wand tip just below the surface, and stretch for a few seconds before letting the whirlpool spin the milk. Stop the steam at 150-155°F and let carryover finish the job, since pulling at 160°F can leave you at 165-170°F.
- Cold milk and a cold pitcher give you more time to build foam before the milk heats up.
- Keep the wand tip just under the surface during stretching and listen for a soft hiss.
- Treat 160°F as a stop sign, not a finish line, and pull the wand at 150-155°F.
- Aim for 150-155°F on oat and almond milks because some scorch faster.
- Clip the thermometer so the probe sits in the milk without touching the bottom or side wall.
Table of Contents
- Step-by-Step: How to Froth Milk to 160 Degrees
- The Best Temperature for Steaming Milk (and Why 160°F Works)
- Using a Milk Thermometer for Steaming (and Managing Carryover)
- How to Make Microfoam for Latte Art
- How to Prevent Milk from Scorching
- No-Thermometer Method Calibrated to 160°F
- Troubleshooting Temperature-Specific Failures
- Upgrade Your Milk Game with Modesto & Associates
- Frequently Asked Questions
Step-by-Step: How to Froth Milk to 160 Degrees
Learning how to froth milk to 160 degrees is the difference between a flat, lukewarm latte and one with glossy, sweet microfoam. The 160°F mark sits in the sweet spot: hot enough to feel right in the cup, cool enough to keep milk sugars from turning bitter.
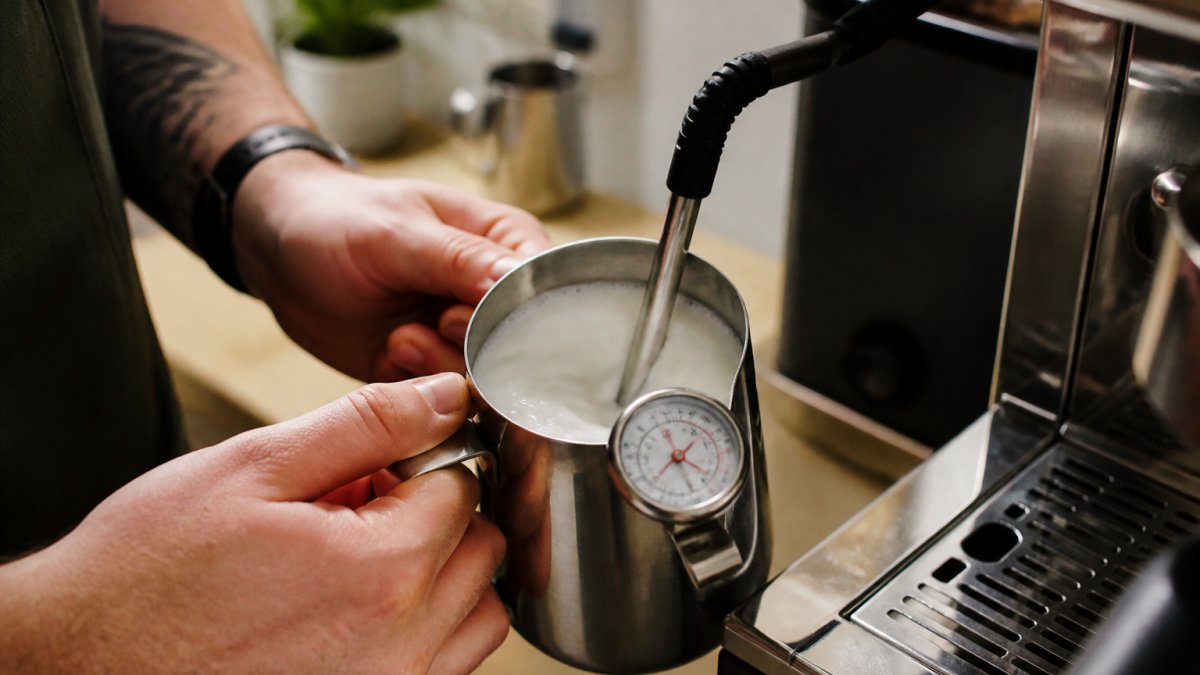
Step 1: Chill the Milk and Pitcher
Cold milk and a cold pitcher give you more time to build foam before the milk heats up. Fill a stainless steel pitcher about one-third full and keep both in the fridge until you're ready. Room-temperature milk rushes past the stretching window, and you end up with big, soapy bubbles instead of silky foam.
Step 2: Position the Steam Wand Tip
Place the wand tip just below the milk surface, slightly off-center. This angle sets up the whirlpool that folds air into the milk. If the tip sits too deep, no air enters. Too shallow, and you get a violent, splashing mess.
Step 3: Stretch, Then Spin
Open the steam valve and hold the pitcher steady for a few seconds of stretching. You'll hear a soft, papery hiss as air enters. Once the volume rises, lift the pitcher slightly so the tip sits deeper and the milk starts spinning. This whirlpool phase is where large bubbles break down into microfoam.
Step 4: Heat to 160°F and Stop
Watch your thermometer and cut the steam the moment it reads 160°F. The milk keeps heating for a few seconds after you stop, so pulling early prevents overshooting. Swirl the pitcher, tap it once on the counter, and pour. If you want more technique context, our guide on how to froth milk like a barista covers the full routine.
The Best Temperature for Steaming Milk (and Why 160°F Works)
The best temperature for steaming milk is 160°F for most dairy and plant-based milks. At this point, the milk proteins have unfolded enough to hold a stable foam, and the natural sugars taste sweet rather than cooked.
Here's the practical range we work with:
- 150°F: Safe minimum for a warm drink, but foam is less stable
- 155°F: Good for delicate plant-based milks that scorch easily
- 160°F: The sweet spot for dairy and most barista blends
- 165°F+: Risk of scalding and burnt notes
Different milks behave differently. Whole dairy milk handles heat well and foams easily thanks to its fat content. For more on holding steady temps, see our piece on maintaining ideal milk temperature for lattes at home.
Using a Milk Thermometer for Steaming (and Managing Carryover)
A milk thermometer for steaming removes the guesswork, but only if you use it correctly. The single most common mistake is treating 160°F as a target to hit on the dial. In practice, 160°F is an upper limit, not a required destination. Most dairy milk tastes sweetest and holds foam best somewhere between 140°F and 155°F, and 160°F is the ceiling you should not cross. That distinction matters because carryover will push you past the ceiling if you aim for it directly.
Choosing and Placing the Thermometer
Clip-on dial thermometers and instant-read digital models both work for steaming, though their response times differ. Either works, but placement decides whether the reading is useful. Clip the thermometer to the pitcher so the probe sits in the milk but does not touch the bottom or the side wall. A probe resting against hot metal reads the pitcher, not the milk, and can be off by several degrees. Keep the probe below the surface throughout the steam so the whirlpool continuously moves milk across it.
The Carryover Rule
Milk continues to heat after you cut the steam as the pitcher equalizes. That is why pulling the wand at 160°F can leave you at 165-170°F by the time you pour, which is squarely in scalding territory. The practical fix is to stop steaming at around 150-155°F and let carryover finish the job. Swirl the pitcher, wait a few seconds, and check the reading again before pouring. If you are steaming a small volume, carryover is faster and larger; if you are steaming a full pitcher, it is slower.
Matching the Pull Point to the Milk
Whole dairy milk handles heat well and foams easily thanks to its fat content, so a pull point near 155°F is safe. Oat and almond milks vary by brand, and some scorch faster, so aim for 150-155°F on those and watch for a change in smell. Barista blends are formulated to hold up closer to the ceiling, but they still benefit from the same carryover buffer. For more on holding steady temps, see our piece on maintaining ideal milk temperature for lattes at home.
How to Make Microfoam for Latte Art
Microfoam is milk foam with bubbles so small the surface looks like wet paint. It's the foundation of latte art, and it comes from two things: proper aeration early and a strong whirlpool later. Stretch for just a few seconds, then spend the rest of the steam time spinning the milk to break bubbles down.
A few habits make the difference:
- Start with cold milk and a cold pitcher
- Keep the wand tip just under the surface during stretching
- Listen for a soft hiss, not loud gulping
- Finish with a glossy, uniform texture before pouring
If your foam looks bubbly or separated, you likely stretched too long or skipped the spin. For a deeper walkthrough, read our guide on how to achieve cafe quality microfoam at home.
How to Prevent Milk from Scorching
Scorching happens when milk sits too long at high heat or the wand tip touches the bottom of the pitcher. The result is a burnt, eggy smell and a film on the pitcher that's hard to clean off.
Plant-based milks scorch faster than dairy, so lower your target to 150-155°F for those. Always purge and wipe the wand right after each use. Residual milk bakes onto the wand and affects flavor next time. Our article on steam wand cleaning mistakes covers the habits that keep your wand in good shape.
No-Thermometer Method Calibrated to 160°F
No thermometer? You can still get close to 160°F with touch, sound, and timing, but be honest with yourself about what this method can and cannot do. Sensory cues are a fallback, not a substitute for a thermometer. They can keep you out of scalding territory, but they will not reliably land you within a degree or two of the ceiling. The trick is to calibrate your senses against a thermometer over a few sessions, then use them when the thermometer is not handy.
The Four Cues
- Touch the pitcher: At 160°F, the metal is hot but you can hold it for two to three seconds before pulling away. Below 140°F you can hold it comfortably for much longer; past 165°F you will let go almost immediately. This is the coarsest cue and the one most affected by pitcher thickness.
- Listen for the pitch change: The steam hiss deepens as the milk heats and the foam stiffens. A soft, papery hiss during stretching gives way to a lower, steadier roar during the whirlpool phase.
- Watch the volume: Foam stops rising and the surface turns glossy right around the target. If the surface still looks wet and bubbly, you are early; if it looks dry or matte, you are late.
- Time it: Smaller volumes generally finish faster, so treat any clock as a rough guide, not a rule.
Calibrating Your Senses
Practice with a thermometer alongside your senses for about a week. Steam a pitcher, note the dial reading at the moment your hand wants to pull away, and compare it to the sound and the surface. Once your hand and ear agree with the dial across several sessions, you can drop the thermometer for daily use. Recalibrate whenever you change pitchers, milk types, or machines, because each one shifts the cues.
When to Trust the Cues
The method works best with whole dairy milk in a stainless steel pitcher you use every day. It works least well with thin plant-based milks, small volumes, and unfamiliar equipment. When any of those variables change, fall back to the thermometer until you have recalibrated.
Troubleshooting Temperature-Specific Failures
Temperature problems show up in predictable ways. Here's how to diagnose them fast:
| Problem | Likely Cause | Fix |
|---|---|---|
| Foam is thin and flat | Stopped stretching too early | Stretch 3-5 seconds longer |
| Milk tastes burnt | Overshot past 170°F | Pull wand at 155°F for carryover |
| Big soapy bubbles | Wand tip too shallow | Lower tip just under surface |
| Foam separates quickly | Milk overheated or old | Use fresh cold milk, stop at 160°F |
| Scorched film on pitcher | Wand touched bottom | Keep tip off the base, keep it moving |
Most failures trace back to wand position or timing. Fix one variable at a time so you know what changed.
Upgrade Your Milk Game with Modesto & Associates
Hitting 160°F consistently gets easier with equipment built for it. Modesto & Associates offers professional-grade, super-automatic espresso machines and milk cooling accessories.
Here's what our setup brings to your counter:
- Barista-quality coffee at home without manual brewing
- Super-automatic operation for convenient, automated preparation
- Integrated milk cooling to keep milk at the right temperature before steaming
If you're ready to upgrade, take a look at the Magic M2+ and see how it fits your routine. Get started with Modesto & Associates and enjoy café-standard drinks at home with less effort.
Frequently Asked Questions
How do you froth milk to 160°F?
Start with cold milk and a chilled pitcher. Submerge the steam wand tip just below the surface, open the steam valve, and hold the pitcher so the tip introduces air for 3-5 seconds. Lower the pitcher slightly to create a whirlpool and continue steaming until a thermometer reads 160°F. Stop steaming immediately, tap the pitcher to pop large bubbles, and swirl before pouring.
Is 160°F too hot for frothed milk?
160°F is a common target for steamed milk because it is hot enough to feel café-style but below the point where milk proteins break down and cause a cooked or scorched flavor. Above 160°F, sweetness fades and the foam can turn stiff or grainy. If you prefer a cooler drink, aim for 150-155°F and adjust your carryover expectations.
Can you use 2% milk for frothing?
Yes, 2% milk froths well. It has enough protein to build stable foam, though the foam will be slightly less rich than whole milk. For best results, keep it very cold and use a stainless steel pitcher. Plant-based milks vary; barista-style versions are formulated to foam more reliably than standard almond or oat milk.
How can you tell when steamed milk reaches 160°F without a thermometer?
Use the touch-and-time method: hold the pitcher with your bare hand (if comfortable) and steam until the side is too hot to hold for more than a second or two, which usually happens around 140-150°F. Then continue for another 10-15 seconds while listening for a quiet, paper-tearing sound. This is approximate; a milk thermometer is the only reliable way to hit 160°F precisely.
Ready to stop guessing at temperature and start pouring silky microfoam every time? Explore our lineup and find the machine that matches your kitchen and your coffee habits.