 how-to
How to Achieve Cafe Quality Microfoam at Home
Table of Contents
- How to Achieve Cafe Quality Microfoam at Home: Start Here
- How to Steam Milk at Home: Step-by-Step
- Best Milk for Latte Art: Fat, Protein, and Plant Options
- Milk Steaming Temperature: Why 140°F Is the Target
- Microfoam Troubleshooting: Fix Bubbles, Foam, and Flat Milk
- Automated Machines That Deliver Cafe Quality Microfoam
- Conclusion
- Frequently Asked Questions
Last Updated: October 7, 2026
How to Achieve Cafe Quality Microfoam at Home: Start Here
Cafe quality microfoam is the glossy, paint-like milk layer that separates a flat white from a sad cup of hot milk. It's also the hardest part of espresso to learn, which is why so many home setups stall at "warm milk with bubbles on top." This guide from Modesto & Associates breaks the whole process into three moves you can practice this week.
Here's the good news: the technique takes minutes to learn. The hard part is knowing what to look for.
Most guides skip the physics. They tell you to "steam until it looks right" without explaining why milk behaves the way it does. That's backwards. Once you understand what's happening inside the pitcher, you can fix almost any problem yourself.
Below, we'll walk through the exact steps for how to achieve cafe quality microfoam at home, from chilling your pitcher to fixing the three most common failures.
How to Steam Milk at Home: Step-by-Step
Steaming milk at home comes down to three moves: chill and fill, position the wand, then stretch and roll. Get those right and you'll produce cafe quality microfoam without any guesswork.
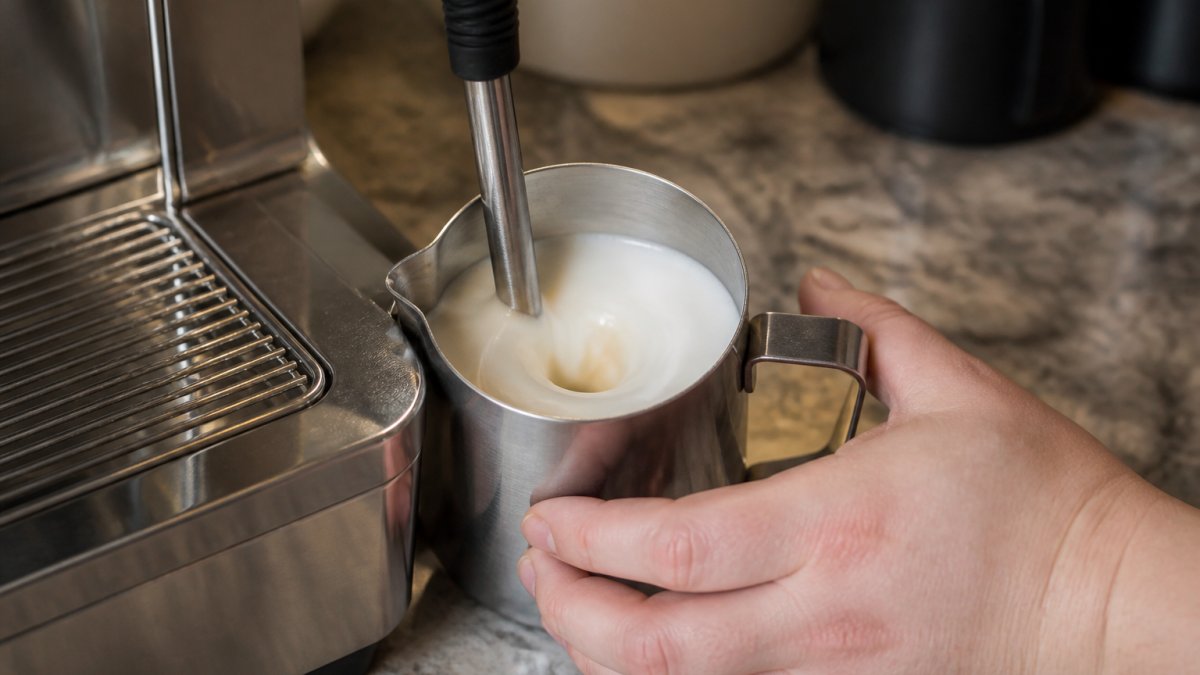
Step 1: Chill and Fill Your Pitcher
Start with cold milk, straight from the fridge. Fill the pitcher to just below the base of the spout.
That's roughly half full. Why? Because milk expands as you add air, and a pitcher that's too full will overflow before you're done.
Use a pitcher that's larger than you think you need. A 12-ounce pitcher for 6 ounces of milk gives the milk room to spin.
Step 2: Position the Steam Wand
Place the wand tip just under the surface of the milk, slightly off-center. Not in the middle.
The off-center position creates a whirlpool. That spinning motion is what folds air into the milk instead of leaving it as a layer of foam on top.
Angle the pitcher slightly so the wand tip sits near the wall of the pitcher. Keep the tip submerged by about a quarter inch.
Step 3: Stretch, Then Roll
Turn the steam on full. You'll hear a soft, papery hiss at first. That's the "stretch" phase, where you're adding air.
Hold that position for a few seconds. Then lift the pitcher just slightly so the wand tip sinks deeper. The hiss stops and the milk starts to swirl. That's the "roll" phase.
Keep rolling until the pitcher feels too hot to hold comfortably against your palm. Then shut the steam off and wipe the wand.
Best Milk for Latte Art: Fat, Protein, and Plant Options
Whole dairy milk is the best choice for latte art because its fat and protein content holds air bubbles in a stable structure. Lower-fat milk still foams, but the bubbles collapse faster.
Here's how the common options stack up:
| Milk Type | Foam Quality | Best For |
|---|---|---|
| Whole dairy | Excellent, stable | Latte art, flat whites |
| 2% dairy | Good, slightly thinner | Lattes, cappuccinos |
| Skim dairy | Airy but dries out fast | Light cappuccinos |
| Oat (barista blend) | Very good, creamy | Dairy-free latte art |
| Almond | Fair, separates easily | Simple hot drinks |
| Soy | Good, can taste beany | Dairy-free cappuccinos |
Protein matters more than fat for structure. That's why barista-blend oat milk, which has added protein and oil, outperforms standard oat milk by a wide margin.
If you're pouring art, whole milk or barista oat are your two best picks. Everything else works, but you'll fight the texture.
Milk Steaming Temperature: Why 140°F Is the Target
The ideal milk steaming temperature is 140°F, which is hot enough to drink but cool enough to keep the milk sweet. Push past 150°F and the proteins start to break down, and the milk takes on a cooked, slightly eggy taste.
Here's the practical version:
- Start: cold milk, around 40°F
- Stop: 140°F, measured with a thermometer or by feel
- Danger zone: above 155°F, where sweetness disappears
If you don't own a thermometer, use your hand. When the pitcher becomes too hot to hold against your palm for more than a second or two, you're close to 140°F. Shut it down.
The temperature rule matters more than most people realize. A perfectly textured milk at 170°F still tastes worse than an average pour at 140°F.
Microfoam Troubleshooting: Fix Bubbles, Foam, and Flat Milk
Microfoam troubleshooting comes down to three failures: big bubbles, dry foam, and milk that won't foam at all. Each one has a single cause and a single fix.
Big bubbles on top. You stretched too long. The wand tip stayed near the surface and pumped in too much air. Fix: shorten the stretch phase next time and roll longer.
Dry, stiff foam. The milk overheated or sat too long before pouring. Fix: stop at 140°F and pour within 20 seconds of finishing.
Flat milk with no foam. The wand was too deep the whole time, so no air entered. Fix: start with the tip just barely breaking the surface.
Foam that separates in the cup. The milk wasn't rolled long enough. The air never got folded into the liquid. Fix: extend the roll phase until the pitcher feels uniformly warm.
Automated Machines That Deliver Cafe Quality Microfoam
Super-automatic espresso machines now handle the milk side of the equation for you. Instead of learning wand technique, you press one button and the machine stretches, rolls, and stops at the right temperature on its own.
That's the appeal for anyone who wants cafe quality microfoam without a morning practice session. The trade-off is control. Manual steaming lets you adjust for a specific milk or a specific drink. A machine gives you consistency.
At Modesto & Associates, we carry professional-grade super-automatic machines paired with integrated milk cooling. The cooling accessory keeps milk at a safe, steady temperature between pours.
If you're weighing the switch, ask yourself one question. Do you want to master the technique, or do you want the drink? Both are valid. They just lead to different equipment.
Conclusion
The gap between home milk and cafe milk is smaller than it looks. Chill the pitcher, position the wand off-center, stretch briefly, then roll until the pitcher is warm. That's the whole skill.
If you'd rather skip the learning curve, Modesto & Associates offers super-automatic machines with integrated milk cooling that handle the steaming for you. You get consistent temperature, stable texture, and one-button operation every morning.
Ready to upgrade your daily cup? Shop Magic M2+
Frequently Asked Questions
How do you make cafe quality microfoam at home?
Start with cold whole milk in a stainless pitcher, submerge the steam wand tip just below the surface, and open the valve to introduce air for 3-5 seconds. Then lower the pitcher slightly so the tip sits deeper and creates a rolling vortex until the milk reaches 140°F. Tap the pitcher on the counter and swirl to knock out large bubbles. The result is glossy, pourable microfoam with the texture you get at a coffee bar.
What milk works best for microfoam?
Whole dairy milk with about 3.5% fat produces the best milk for latte art because its fat and protein content stabilizes fine bubbles and holds shape during pouring. Reduced-fat and skim milk foam faster but create stiffer, less glossy foam. Oat and soy barista blends work well too if they contain added oils or stabilizers. Avoid low-protein nut milks, which tend to break apart when steamed.
What temperature should milk be for microfoam?
Stop steaming when the pitcher feels hot but still comfortable to hold, around 140°F. Milk steaming temperature above 155°F scalds the proteins, kills sweetness, and causes the foam to separate. Below 130°F the foam stays thin and runny. Use a thermometer for the first few weeks until you can judge by touch. The pitcher should feel warm against your palm but never painful.
Why is my steamed milk foamy and bubbly?
Large bubbles mean you introduced too much air or held the steam wand too close to the surface for too long. Microfoam troubleshooting starts with shortening the stretch phase to 3-5 seconds and then submerging the tip deeper so the milk rolls instead of splashing. If bubbles persist, tap the pitcher firmly on the counter and swirl for 10-15 seconds before pouring. Also check that your steam wand is clean and free of dried milk residue.
Perfect microfoam is a small skill with a big payoff. It changes how every drink you make tastes, and it takes less practice than most people expect. If you want that result without the trial and error, Modesto & Associates builds machines that deliver it automatically, with integrated milk cooling and one-touch operation. Get started with Modesto & Associates and pour a better cup tomorrow morning.