 listicle
Best Milk Cooling Accessory for Espresso Machines 2026
Table of Contents
- Quick Comparison: Top Milk Cooling Accessories for Espresso Machines
- Essential Espresso Machine Accessories for Temperature Control
- How to Froth Milk Like a Barista: Techniques for Perfect Microfoam
- Espresso Machine Milk Temperature Control: Why It Matters for Latte Art
- DIY vs. Commercial-Grade Cooling Solutions for Home Baristas
- Long-Term Maintenance and Hygiene for Milk Cooling Accessories
- Compatibility and Workflow: Matching Accessories to Your Espresso Machine
- Frequently Asked Questions
Last Updated: September 22, 2026
Quick Comparison: Top Milk Cooling Accessories for Espresso Machines
The best milk cooling accessory for espresso machines depends on whether your machine has an integrated system or needs a standalone solution. Integrated refrigeration offers the most consistent temperature control; thermal carafes and pitchers are affordable alternatives for manual setups.
Temperature stability matters more than most home baristas realize: milk that sits too warm or too cold won't produce silky microfoam.
| Accessory Type | Best For | Temperature Control | Maintenance |
|---|---|---|---|
| Integrated refrigeration | Super-automatic machines | Excellent | Moderate |
| Peltier cooling elements | Prosumer setups | Good | Low |
| Thermal carafes | Manual machines | Fair | Easy |
| Insulated pitchers | Budget setups | Basic | Easy |
Essential Espresso Machine Accessories for Temperature Control
Temperature control separates acceptable espresso from exceptional espresso. The right accessories keep milk at the ideal 55-65°F range before steaming, which affects foam texture and drink consistency, and determines how much of your workflow is automated.
Integrated Refrigeration and Peltier Cooling Elements
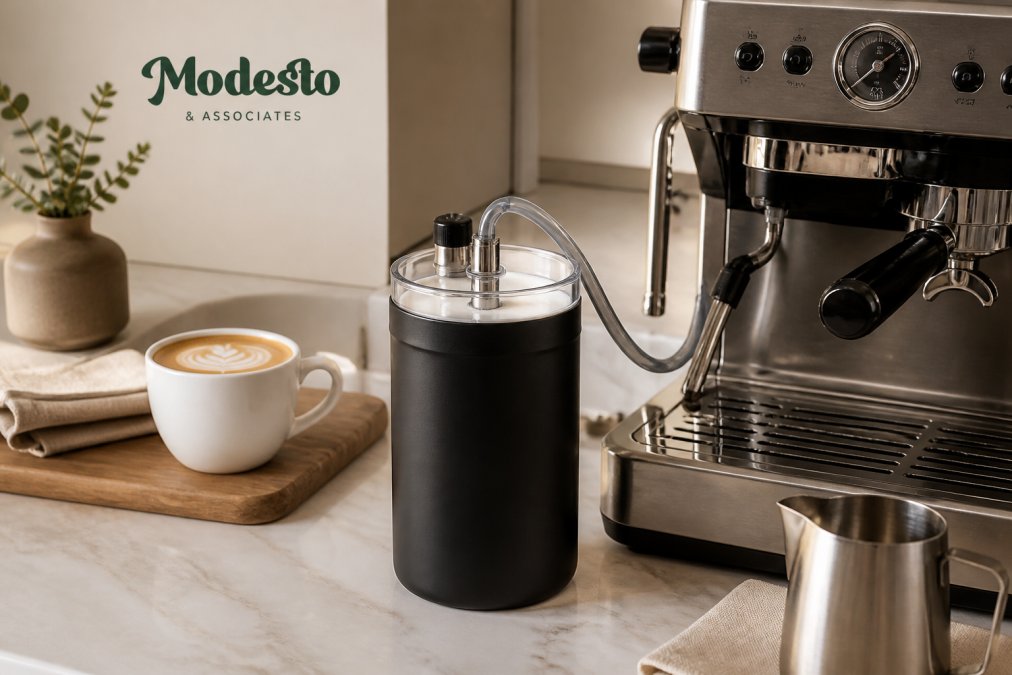
Integrated refrigeration is a built-in cooling system that maintains milk at food-safe temperatures directly within the espresso machine. These systems hold milk between 36-41°F until the steam cycle begins, so it never sits in the temperature danger zone during a busy service period.
Key Peltier design factors to evaluate:
- Heat sink and fan quality. A larger finned heat sink with a quiet fan moves more heat and keeps the cold side colder. Dust on the fins is the single most common cause of degraded performance.
- Insulation around the milk vessel. Double-walled or foam-insulated housings reduce how hard the module has to work.
- Power draw. Most countertop Peltier milk chillers draw between 40-80 watts, modest compared to a compressor refrigerator, but enough that you should not stack several on one circuit.
- Ambient temperature rating. Some units specify a maximum ambient temperature; ignoring it shortens the module's life.
Milk Carafes and Pitchers with Thermal Regulation
Double-walled stainless steel carafes with vacuum insulation keep milk cold for hours without electricity, useful when pulling multiple shots in sequence. Removing the air between the walls eliminates the conduction and convection paths that carry heat into the milk, so a quality vacuum carafe holds milk below 41°F for two to four hours when pre-chilled and kept closed.
Look for carafes with:
- Vacuum insulation between walls
- Airtight lids to prevent odor absorption
- Measurement markings for consistent dosing
- Dishwasher-safe construction
- A wide mouth that fits a steam wand and a thermometer probe
Matching the Accessory to Your Machine Type
The right choice depends on how your machine handles milk. Super-automatic machines with a built-in milk circuit need proprietary carafes or integrated refrigeration. Prosumer machines with a standard steam wand accept any insulated pitcher, so a Peltier chiller or vacuum carafe is the practical upgrade. Manual machines need only a vacuum carafe plus a clip-on thermometer.
How to Froth Milk Like a Barista: Techniques for Perfect Microfoam
Perfect microfoam starts with cold milk and ends with a glossy, paint-like texture: position the steam wand tip just below the surface to introduce air, then submerge deeper to create a rolling vortex.
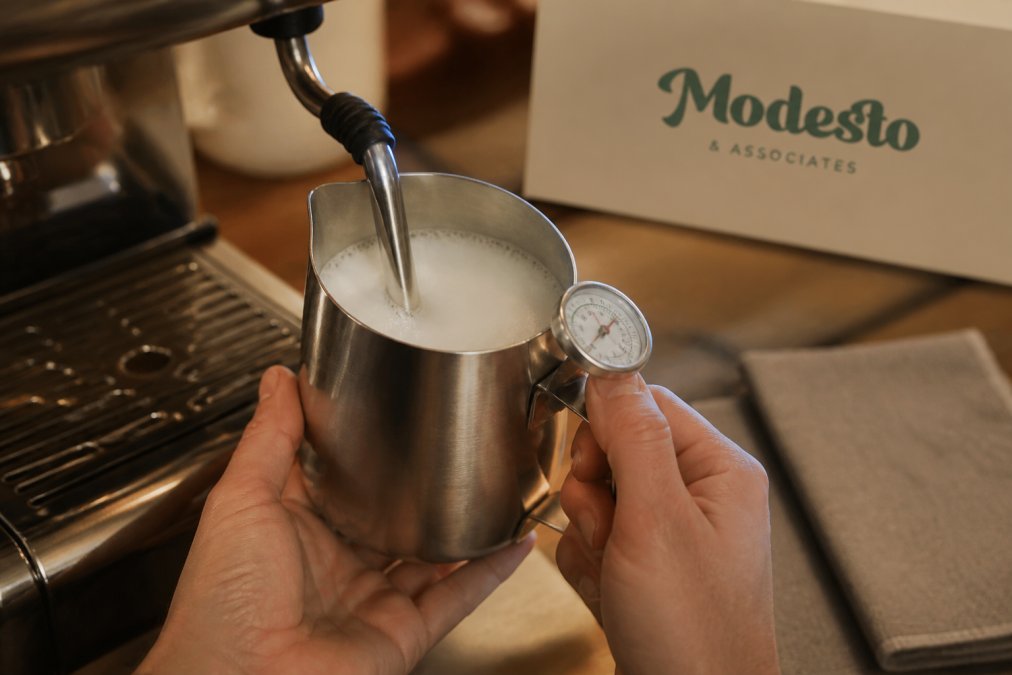
Here's the sequence that produces consistent results:
- Fill your pitcher one-third full with cold milk
- Position the steam wand tip at the surface's edge
- Open the steam valve and listen for a gentle hissing sound
- Lower the pitcher gradually as foam builds
- Submerge the tip to create a rolling vortex
- Stop when the pitcher becomes too hot to hold comfortably
- Tap the pitcher on the counter to break large bubbles
- Swirl before pouring to integrate the foam
Espresso Machine Milk Temperature Control: Why It Matters for Latte Art
Milk temperature control determines whether your latte art pours cleanly or collapses into a blob. Milk steamed beyond 155°F breaks down proteins and loses its ability to hold shape.
DIY vs. Commercial-Grade Cooling Solutions for Home Baristas
Most guides jump straight to integrated refrigeration units that cost as much as a mid-range grinder, leaving out home baristas running prosumer machines who want cold milk without a four-figure accessory. This section covers the full spectrum, from a bowl of ice water to a dedicated coffee-station refrigerator, and where each approach breaks down.
DIY Cooling Methods That Actually Work
Ice bath with a stainless pitcher. Fill a wide bowl with ice and a little water, nest your pitcher in it, and stir occasionally. This drops milk from room temperature to the low 40s in roughly 10-15 minutes. The failure mode is uneven chilling, milk against the pitcher wall gets cold while the center stays warm, producing inconsistent foam. Stirring fixes this but adds time.
Where DIY Breaks Down
The honest limitation of every DIY method is consistency. Ice baths and frozen pitchers depend on your timing and attention; on a rushed morning, the milk goes in warm and the foam suffers. Commercial-grade accessories remove the human variable.
Commercial-grade cooling accessories offer:
- Consistent temperature without monitoring
- Food-safe materials rated for dairy storage
- Integration with your existing workflow
- Easier sanitation between uses
- Stable performance across ambient kitchen temperatures
The Middle Ground: Coffee-Station Refrigerators
A dedicated milk refrigerator designed for coffee stations is the sweet spot for most home setups. These compact units hold multiple carafes at safe temperatures and eliminate trips to your main refrigerator. Look for a digital thermostat, a range reaching 35-38°F, and removable shelves sized for standard milk pitchers.
| Factor | Coffee-Station Fridge | Integrated System |
|---|---|---|
| Upfront cost | Lower | Higher |
| Countertop footprint | Requires dedicated space | Built into machine |
| Cleaning burden | Carafe and fridge surfaces | Milk lines plus carafe |
| Machine compatibility | Universal | Brand-specific |
| Best for | Prosumer and manual setups | Super-automatic machines |
A Decision Framework
Ask three questions before buying:
- How often do you steam milk? Once a day or less, a vacuum carafe is enough. Several times a day, an active cooling accessory earns its place.
- How much counter space can you spare? A standalone fridge needs roughly the footprint of a small microwave. An integrated system needs none beyond the machine itself.
- How much cleaning are you willing to do? Milk lines in integrated systems require periodic flushing. Carafes and pitchers are simpler but need daily washing.
Long-Term Maintenance and Hygiene for Milk Cooling Accessories
Dairy storage hygiene determines how long your accessories last and how safe your drinks remain. Milk residue creates biofilm that harbors bacteria and clogs small components in cooling systems.
A weekly cleaning routine should include:
- Disassembling removable parts
- Washing with hot soapy water
- Rinsing thoroughly to remove residue
- Sanitizing with food-safe solution
- Air-drying completely before reassembly
Compatibility and Workflow: Matching Accessories to Your Espresso Machine
Machine compatibility determines which cooling accessories will work in your setup. Super-automatic machines often have proprietary milk systems, while manual machines accept universal pitchers and carafes.
Consider these compatibility factors:
| Machine Type | Compatible Cooling | Workflow Impact |
|---|---|---|
| Super-automatic | Integrated refrigeration, proprietary carafes | Minimal effort, automated |
| Prosumer | Peltier elements, thermal carafes | Moderate involvement |
| Manual | Any insulated pitcher or carafe | Full manual control |
Frequently Asked Questions
Why do I need a milk cooler for my espresso machine?
A milk cooler keeps milk at a consistent 34-38°F, which is critical for food safety and frothing consistency. Warm milk froths poorly and can harbor bacteria. Integrated refrigeration or peltier cooling elements maintain temperature stability throughout your barista workflow, so you get better microfoam and avoid waste. For home baristas making multiple drinks, a cooling accessory reduces trips to the refrigerator and helps maintain optimal serving temperature.
What is the ideal temperature for milk in an espresso machine?
For steaming and frothing, milk should start cold, ideally between 34-38°F. When steamed, the final target is 140-155°F. Above 155°F, milk proteins break down and taste scalded. Below 140°F, you lose the sweetness and texture needed for latte art consistency. Using a milk cooling accessory ensures your starting temperature is always right, which directly improves frothing consistency and microfoam quality.
Are refrigerated milk containers worth the investment for home baristas?
Yes, if you make multiple milk-based drinks daily or entertain guests. A refrigerated container or integrated cooling system maintains milk temperature stability, reduces waste, and speeds up your barista workflow. For occasional use, a high-quality stainless steel pitcher with vacuum insulation may suffice. The best milk cooling accessory for espresso machines depends on your volume and machine type, but any cooling solution that maintains proper temperature will improve cappuccino preparation and latte art consistency.
How do I maintain a milk cooling accessory for espresso machines?
Daily rinsing with warm water prevents milk residue buildup. Weekly, disassemble removable parts and wash with mild detergent, then sanitize according to sanitation standards. For integrated systems, run a descaling solution like Urnex Dezcal monthly to prevent mineral buildup in cooling lines. Check hoses and seals for cracks. Proper dairy storage hygiene extends the life of your accessory and ensures safe, great-tasting milk for espresso extraction and milk texture.
Can a milk cooler improve the quality of my microfoam?
Yes. Cold milk (34-38°F) creates smaller, more stable bubbles because the fat and proteins are more stable at lower temperatures. When milk warms during frothing, the foam structure sets properly. If milk starts too warm, bubbles are larger and collapse quickly, ruining milk texture. A milk cooling accessory ensures consistent starting temperature, which is key for frothing consistency and professional-grade microfoam in your home barista setup.