 how-to
Maintaining Ideal Milk Temperature for Lattes at Home
Last Updated: October 22, 2026
Quick Summary
The ideal milk temperature for lattes is 150-160°F (60-65°C). Stop steaming at 150°F and let carryover heat bring the milk to about 153-157°F while you wipe the wand and load the shot. Above 160°F the proteins clump and the foam collapses.
- Clip the thermometer to the pitcher rim before you start steaming, not mid-steam.
- Milk climbs roughly 1°F per second on a typical home steam wand in the final stretch.
- Start checking the reading at 100°F, when the temperature climb becomes fast.
- Stop low-fat and thin plant milks at 145-148°F; treat barista-style plant milks like whole dairy.
- Never re-steam milk you have already heated, because the foam will not recover.
Table of Contents
- Why Milk Temperature Decides Whether Your Latte Tastes Sweet or Scorched
- The Ideal Milk Steaming Temperature Range for Lattes
- How to Steam Milk for a Latte: A Repeatable Step-by-Step Workflow
- Choosing a Milk Thermometer for Steaming (and Using It Correctly)
- How to Avoid Overheating Milk: Signs, Causes, and Fixes
- Temperature Guidance by Milk Type and Equipment
- Holding Milk at Serving Temperature and Troubleshooting Inconsistent Results
- Frequently Asked Questions
Why Milk Temperature Decides Whether Your Latte Tastes Sweet or Scorched
Milk temperature is the single variable that separates a sweet, silky latte from one that tastes flat and burnt. At Modesto & Associates, we see home baristas chase grind size and pressure while ignoring the thermometer, and that is usually the real problem in the cup.
Heat changes milk in two ways. First, it breaks down the proteins and fats that create foam. Second, it unlocks natural sweetness, but only inside a narrow window. Push past that window and the sugars turn bitter.
What Heat Does to Milk Fats, Proteins, and Sweetness
Milk is an emulsion: fat droplets and protein suspended in water. When steam heats milk, the proteins unfold and trap air, which is what builds foam. The fats coat those bubbles and keep them small and glossy.
Heat also makes lactose taste sweeter, up to a point. Keep going and you cross into scalding. The proteins clump, the foam collapses, and a cooked, eggy note takes over.
The Ideal Milk Steaming Temperature Range for Lattes
The ideal milk steaming temperature for lattes is 150-160°F (60-65°C). Pull the pitcher off the steam wand at 150°F and let carryover heat bring it to about 155°F while you wipe the wand and load the shot.
Two numbers matter, and most guides blur them:
| Stage | Temperature | Why It Matters |
|---|---|---|
| Stop steaming | 150°F | Leaves room for carryover heat |
| Ideal serving range | 150-160°F | Sweetest, silkiest texture |
| Drinking window | 140-155°F | Comfortable on the tongue |
| Overheated | Above 160°F | Proteins clump, foam collapses |
Serve a latte too hot and the first sip burns. Let it drop below 140°F and the foam starts to separate. For more on how water temperature shapes the shot itself, the Specialty Coffee Association's brewing standards are a useful reference point.
How to Steam Milk for a Latte: A Repeatable Step-by-Step Workflow
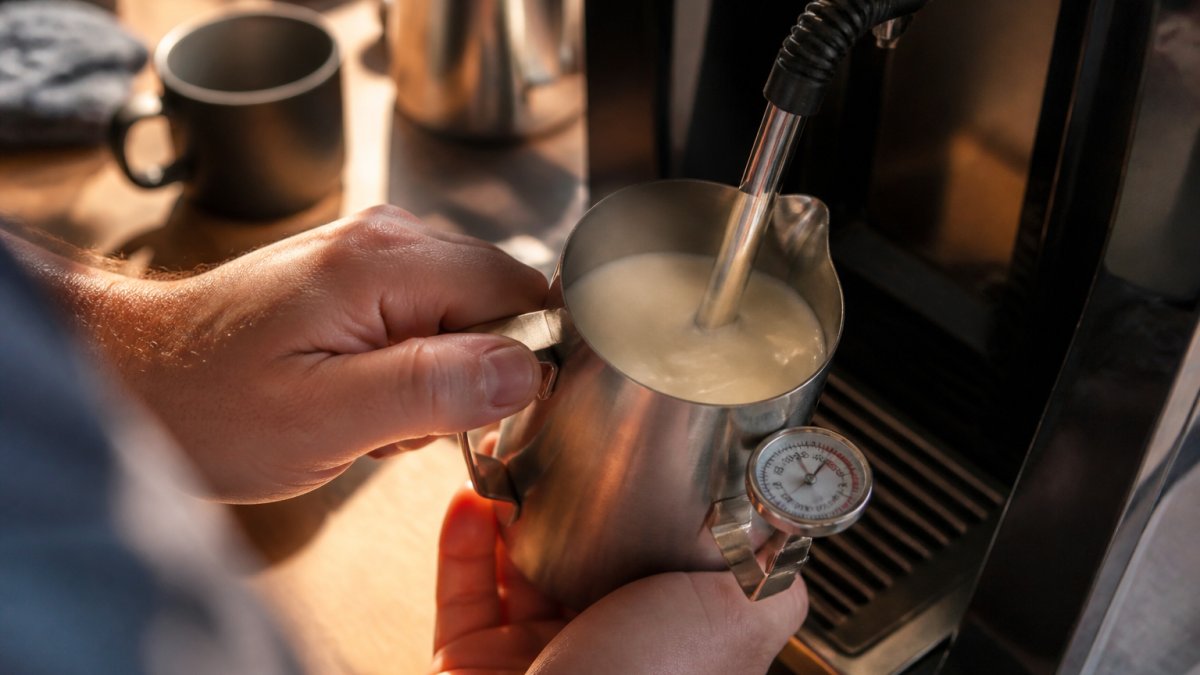
Here is the workflow we teach, and it works on any machine with a steam wand. Total time: about 45 seconds of steaming plus 30 seconds of setup.
What you'll need: cold milk, a chilled stainless pitcher, a clip-on thermometer, and a clean, purged steam wand.
Step 1: Start With Cold Milk and a Chilled Pitcher
Fill the pitcher to just below the spout base. Cold milk gives you more time before you hit the target, which makes the whole process forgiving. A warm pitcher steals that margin.
Step 2: Introduce Air, Then Roll the Vortex
Submerge the tip just under the surface and open the steam. You want a soft, steady hiss, not a screech. After a few seconds of aeration, lift the pitcher slightly so the steam creates a rolling whirlpool. That vortex is what turns big bubbles into microfoam.
Step 3: Stop at Temperature, Not at Foam Height
Watch the thermometer, not the foam. Kill the steam at 150°F. Swirl the pitcher, tap out any large bubbles, and pour. If you wait for the foam to look "done," you have already overheated the milk.
Choosing a Milk Thermometer for Steaming (and Using It Correctly)
A milk thermometer for steaming is a fast-read probe or dial thermometer that clips to the pitcher and reads the milk's temperature as it heats. Any thermometer that updates within a few seconds and reads in Fahrenheit will do, but the thermometer itself is only half the tool. The other half is a repeatable workflow that produces the same result every time, on any machine.
Pick the Right Thermometer for the Job
- Clip-on dial: cheap, sturdy, no battery, a few seconds to settle. Good for beginners who want hands-free monitoring.
- Digital instant-read: faster and more precise, but you hold it, which means one hand is off the pitcher.
- Built-in machine sensor: convenient, but verify it against a probe now and then, sensors drift, and a machine that reports 160°F may be delivering 150°F or 170°F at the wand.
Whichever you use, calibrate it against ice water occasionally. A probe that reads a few degrees off will quietly push every latte out of range, and you will blame the milk or the machine instead of the thermometer.
The Repeatable Temperature-Monitoring Workflow
This is the sequence most guides skip. Follow it exactly and your results stop swinging.
- Clip the probe before you steam. Set the thermometer on the pitcher rim with the probe tip submerged at least one inch into the milk, deep enough to read the liquid, not the foam. Foam reads hotter than the liquid beneath it, so a probe floating in foam gives a false high reading and you pull the pitcher early.
- Start checking at 100°F. Below that, the milk is still cold and the reading tells you nothing useful. At 100°F the climb becomes fast, and this is when you need your eyes on the dial.
- Watch the rate, not just the number. Milk climbs roughly 1°F per second on a typical home steam wand in the final stretch. That rate is why the last 20 degrees disappear before you react.
- Kill the steam at 150°F. Not 155°F, not when the foam looks right. Carryover heat, the residual heat in the milk and pitcher, will bring it up another 3-5°F in the 20-30 seconds it takes you to wipe the wand and load the shot.
- Verify before you pour. If you want a true reading, insert a clean instant-read probe into the liquid (not the foam) just before pouring. Most practitioners find the milk settles at 153-157°F, which is exactly the sweet spot.
Account for Carryover Heat
Carryover is the single most misunderstood variable in milk steaming. The milk does not stop heating the instant you close the valve. The pitcher walls hold heat, the milk mass holds heat, and the foam insulates the liquid below.
That is why the stop temperature and the serving temperature are two different numbers. Stop at 150°F, serve at 153-157°F, and you land inside the ideal band without ever overshooting. If you stop at 160°F because that is your target, carryover pushes you to 165°F and the proteins begin to clump.
Verify Your Machine, Not Just Your Milk
Equipment-specific temperature control matters more than most guides admit. A manual steam wand gives you full control but demands you watch the thermometer closely. A super-automatic machine handles milk automatically, so verify the output temperature with a probe rather than trusting the setting.
The workflow is the same on every machine: probe in the liquid, start checking at 100°F, stop at 150°F, verify before pouring.
How to Avoid Overheating Milk: Signs, Causes, and Fixes
You avoid overheating milk by stopping the steam at 150°F and trusting carryover heat to finish the job.
The signs show up fast. The pitcher gets too hot to hold comfortably. The foam turns stiff and dry instead of glossy. The milk smells cooked, and the surface looks bubbly rather than smooth.
The usual causes:
- Steaming by sound or feel alone. The pitcher heats faster than your hand expects.
- A full pitcher. More milk means a longer climb to temperature, and it is easy to overshoot.
- Waiting for foam height. Foam keeps building after the milk is already too hot.
The fix is the same every time: chill the pitcher, fill it partway, and stop on the thermometer.
Temperature Guidance by Milk Type and Equipment
Different milks behave differently in the same temperature window. The 150-160°F serving range still applies across the board, but how each milk reaches that range, and how much heat it tolerates before texture fails, varies enough that a single instruction underserves every milk except whole dairy.
Dairy Milk
Whole dairy milk is the most forgiving because its fat stabilizes foam. The fat coats the air bubbles and keeps them small and glossy, which is why whole milk produces the silkiest microfoam with the widest margin for error. Lower-fat milk (2%, 1%, skim) foams drier and turns grainy sooner, so pull it a touch earlier, stop at 145-148°F and let carryover finish the job.
Plant Milks
Plant milks vary widely, and the differences are not cosmetic. Barista-style oat and soy hold foam well because they are formulated with added fats and stabilizers that mimic dairy's bubble protection.
A practical rule: treat barista-style plant milks like whole dairy (stop at 150°F), and treat thin, unsweetened plant milks like skim (stop at 145-148°F). Whatever you pour, verify with a probe rather than assuming the carton behaves like the last one.
Equipment Changes the Approach
- Manual steam wand: full control, but you watch the thermometer closely and manage aeration by hand.
- Super-automatic machines: many handle milk automatically, so verify the output temperature with a probe, the setting is a target, not a guarantee.
- Standalone frothers: fast, but they heat unevenly, so stir before pouring and check the average temperature rather than the hot spot against the wall.
This is where a machine with an integrated milk cooling solution earns its counter space. It keeps milk cold until the moment of use, so you start every drink from the same baseline, and a consistent starting temperature is half the battle in hitting 150°F on the nose. Our Magic M2+ and Royal models were built around exactly that idea, and they suit a small office or a bed and breakfast just as well as a home kitchen.
Holding Milk at Serving Temperature and Troubleshooting Inconsistent Results
Holding milk at serving temperature means keeping it in the 150-160°F band for the minute or two between steaming and pouring, not parking it on a hot plate. A pre-warmed cup helps. A cold mug pulls heat out of the drink before the first sip.
When results swing from great to terrible with no obvious cause, work through this list:
| Symptom | Likely Cause | Fix |
|---|---|---|
| Foam collapses fast | Overheated milk | Stop at 150°F |
| Big bubbles, no microfoam | Air added too long | Shorten aeration, roll the vortex |
| Milk tastes burnt | Steamed past 160°F | Chill pitcher, watch thermometer |
| Thin, watery foam | Skim or thin plant milk | Try barista-style milk |
| Inconsistent day to day | No thermometer, eyeballing it | Clip on a probe every time |
The pattern is clear. Almost every inconsistency traces back to temperature control, and a thermometer removes the guesswork. If you want café-standard drinks without babysitting a steam wand, a super-automatic machine with proper milk handling takes the variable out of your hands.
For a deeper look at the standards behind good espresso, the National Coffee Association's brewing guidance covers the fundamentals well.
Frequently Asked Questions
What is the ideal milk temperature for a latte?
Most baristas aim for a milk temperature between 150°F and 160°F (roughly 60°C to 65°C) when steaming for a latte. This range sits below the point where milk proteins begin to denature and sugars start to scorch, so the milk stays sweet and the foam holds a glossy, velvety texture. Above 160°F you'll notice a flatter flavor and foam that breaks down quickly. Serving temperature is slightly lower, since the milk cools as you pour and combine it with espresso.
Do baristas use a thermometer when steaming milk?
Many do, especially when dialing in a new machine or training. A milk thermometer for steaming removes guesswork and makes results repeatable across different pitchers and milk volumes. Experienced baristas often rely on touch, holding the pitcher until the bottom becomes too hot for comfort, which roughly corresponds to the target range. The most reliable approach combines both: use the thermometer to calibrate your hand, then use touch for speed on busy days.
How can I avoid overheating milk when I don't have a thermometer?
Start with cold milk and a chilled pitcher, submerge the steam wand tip just below the surface for the first few seconds to introduce air, then lower it to create a rolling vortex. Keep one hand on the pitcher the entire time. The moment the metal feels too hot to hold comfortably for more than a second, stop steaming. That sensation typically lands near the upper end of the ideal range. Pour immediately, because milk continues to rise in temperature for a few seconds after the steam stops.
Can milk get too hot for a latte, and what happens if it does?
Yes. Pushing milk past roughly 160°F to 170°F scalds the proteins, which flattens the sweetness and gives the foam a bubbly, unstable texture that collapses fast. You may also taste a cooked or slightly bitter note that clashes with espresso. If you overshoot, don't reheat or try to rescue it: pour it out, rinse the pitcher, and start fresh with cold milk. Reheating already-steamed milk produces even worse foam and a stale flavor.
A great latte should not depend on luck or a well-trained wrist. The challenge is consistency: hitting the same sweet spot every morning without thinking about it. Modesto & Associates builds professional super-automatic espresso machines with integrated milk cooling solutions, so your milk starts cold and finishes in range. Explore the Magic M2+ and see how simple a barista-quality latte at home can be.