 how-to
Is a Milk Cooling Accessory Necessary? A Complete Guide
Table of Contents
- Is a Milk Cooling Accessory Necessary for Your Setup?
- How to Keep Milk Cold for Coffee: A Step-by-Step Guide
- The Ideal Milk Temperature for Frothing
- Milk Frothing Tips for Beginners: Getting Consistent Results
- Choosing a Milk Cooler for an Espresso Machine
- Common Mistakes When Using a Milk Cooling Accessory
- Conclusion
- Frequently Asked Questions
Last Updated: October 13, 2026
Is a Milk Cooling Accessory Necessary for Your Setup?
Is a milk cooling accessory necessary? For most home espresso setups, yes. A dedicated milk cooling accessory keeps milk in the safe cold range between pours, which protects flavor and slows spoilage. At Modesto & Associates, we pair super-automatic machines with integrated milk cooling because temperature control is the difference between flat, watery foam and café-standard texture.
Milk is a perishable food. The U.S. Food and Drug Administration sets refrigeration guidance for dairy, and that same logic applies to your countertop pitcher. FDA guidance on refrigerating perishable foods recommends keeping perishable items cold to slow bacterial growth. Milk left at room temperature moves into the danger zone fast, and once it does, no amount of frothing fixes the taste.
So the real question isn't whether cooling matters. It's whether you need a separate accessory or just a fridge. Here's how to decide.
Who Benefits Most from a Milk Cooling Accessory
Four groups get the most from a milk cooling accessory:
- Daily latte drinkers who pull two or more milk drinks a day
- Small offices where milk sits out between rounds of coffee
- Bed and breakfast hosts serving guests across a long breakfast window
- Home entertainers making several cappuccinos in one sitting
If you make one drink a week, your refrigerator is enough. If you make several a day, a cooling accessory earns its counter space.
How to Keep Milk Cold for Coffee: A Step-by-Step Guide
Keeping milk cold for coffee comes down to two things: a cold cooling element and smart positioning. Follow these steps to hold milk at a safe temperature from the first pour to the last.
Total Time: 5 minutes to set up Difficulty: Beginner
Step 1: Prepare Your Cooling Element
Freeze your cooling element fully before use. A partly frozen pack won't hold temperature through a full session. Check the manufacturer's guidance on freeze time, since it varies by unit. USDA food safety and storage guidance stresses keeping cold items consistently cold, so a fully frozen element is the starting point.
Step 2: Load and Position the Milk Container
Pour cold milk into the container and seat it against the cooling element. Keep the pitcher covered when not in use. Position the accessory away from your espresso machine's heat vents. A hot surface nearby undoes the cooling.
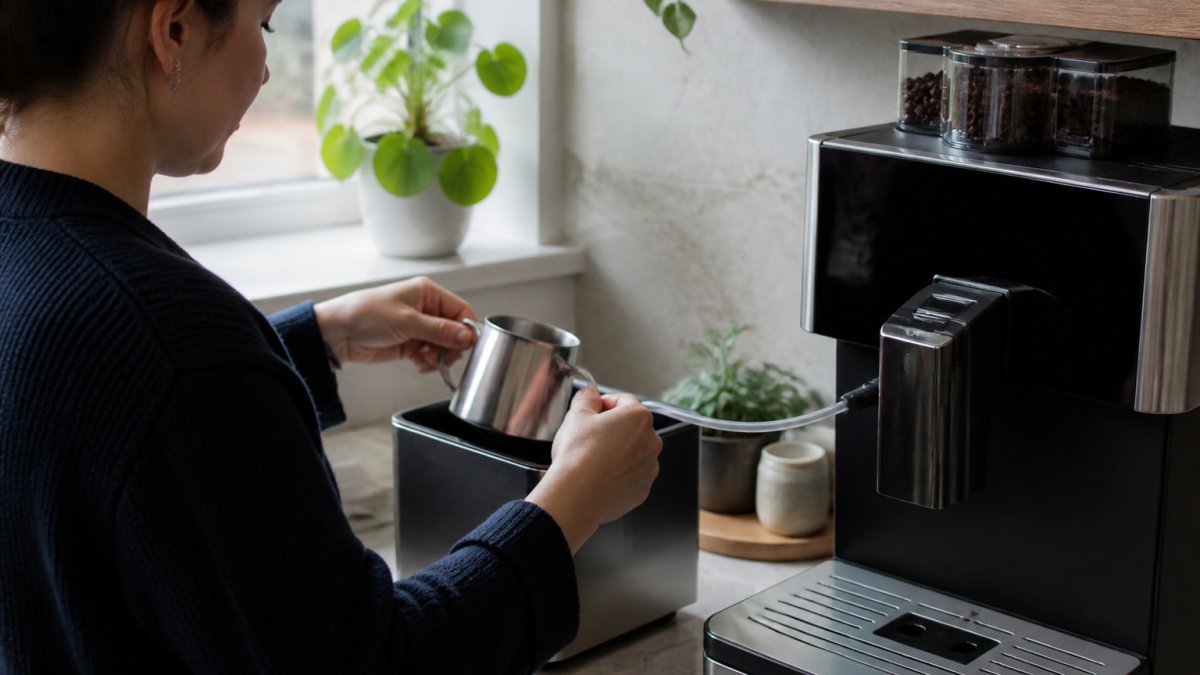
Expected Result: Milk stays cold and ready to froth for your whole session.
The Ideal Milk Temperature for Frothing
The ideal milk temperature for frothing is cold to start and warm to finish. You want milk cold when it hits the pitcher, then steamed to roughly 140°F to 155°F for drinking. Starting cold gives you more time to build foam before the milk overheats.
Here's the practical split:
- Storage: keep milk cold between uses
- Frothing start: begin with cold milk straight from the cooler
- Frothing finish: stop before the pitcher gets too hot to hold
Cold milk stretches better. Warm milk collapses fast. That's why a cooling accessory and good frothing habits work together.
Milk Frothing Tips for Beginners: Getting Consistent Results
Consistent froth starts with cold milk and a clean pitcher. Beginners usually fail for one of three reasons: warm milk, a dirty pitcher, or too much air too fast.
Try these fixes:
- Chill the pitcher before you pour
- Fill only to the marked line, never higher
- Submerge the steam tip just below the surface to start
- Lower the tip once you hear a steady hiss, not a screech
- Tap the pitcher and swirl before pouring
If your foam turns out flat, the milk was likely too warm going in. A milk cooling accessory solves that before it starts.
Choosing a Milk Cooler for an Espresso Machine
A milk cooler for an espresso machine should match your machine, your volume, and your routine. There is no single best pick. The right one fits how you actually make coffee, and the first question is whether you need a dedicated accessory at all.
First, Decide If You Need an Accessory
Ask three questions:
- How long does milk sit out? If it is under 20 minutes, your refrigerator is enough. If it sits out between rounds of coffee for an hour or more, an accessory earns its counter space.
- How many drinks per session? One drink a week does not justify a cooler. Several drinks a day does.
- Do you have refrigeration within arm's reach? If yes, you may only need a small insulated bag and an ice pack. If no, a dedicated cooling accessory makes more sense.
What Counts as a Cooling Accessory
A cooling accessory is a container or system that actively holds milk cold during a session. It is not the same as a refrigerator, which stores milk for days, and it is not the same as an ordinary insulated lunch bag, which only slows warming. Know which one you are buying.
- Refrigerator: long-term storage, not portable, not a session tool.
- Insulated bag with ice pack: slows warming for short trips, good for commuting.
- Countertop cooling accessory: holds milk cold between pours at home or in a small office.
- Integrated cooling solution: built into a super-automatic machine for hands-off temperature control.
Match the Cooler to Your Use Case
| Your Situation | Best Option | Why |
|---|---|---|
| One drink a day at home | Refrigerator only | A cooler adds little at low volume |
| Several drinks daily at home | Countertop cooling accessory | Keeps milk cold between pours |
| Commuting with milk | Insulated bag with ice pack | Portable and enough for a short trip |
| Small office | Larger-capacity cooler | Handles multiple users across the day |
| Bed and breakfast | Integrated cooling solution | Steady cold across a long breakfast service |
| Travel or events | Portable chiller with frozen element | Holds temperature without a wall outlet |
Safety Checks Before You Buy
Cooler performance varies. Before you commit, check the seal, the lid fit, and whether the cooling element is replaceable. A damaged seal or a cracked lid means the accessory will not hold temperature, no matter how good the rest of the design is. If you are buying for a small office or a bed and breakfast, look for a unit that is easy to clean and that has a clear temperature indicator.
For a barista-quality setup, our super-automatic machines pair with integrated milk cooling, so the milk stays cold and the process stays automated. If you want the full workflow in one system, explore what we offer at Modesto & Associates.
Common Mistakes When Using a Milk Cooling Accessory
Most problems with a milk cooling accessory trace back to a few repeat errors. Fix these and your milk stays cold and your drinks stay consistent.
- Using a partly frozen element. It won't hold temperature for a full session.
- Overfilling the container. Milk spills and the cooler can't do its job.
- Skipping the clean. Rinse and dry after every use to stop bacteria and odors.
- Storing milk overnight. The accessory is for a session, not the week.
- Ignoring the seal. A worn lid lets cold air escape and warm air in.
Clean your cooler with warm soapy water, rinse well, and let it dry fully before the next use. Hygiene is not optional when dairy is involved.
Conclusion
Getting milk temperature right is the hardest part of home espresso, and it's the part most people skip. A milk cooling accessory closes that gap, keeping milk cold from the first pour to the last so your foam holds up.
At Modesto & Associates, we build setups around that idea. Our professional super-automatic espresso machines and integrated milk cooling solutions bring café-standard drinks to your counter with automated, convenient preparation. If you're tired of flat foam and warm milk, it's time to upgrade the whole workflow.
Get started with Modesto & Associates and enjoy barista-quality coffee at home.
Frequently Asked Questions
Is a milk cooling accessory necessary for making espresso drinks at home?
It depends on your routine. If you make one or two drinks a day and use milk straight from the refrigerator, a cooling accessory is optional. If you entertain guests, make multiple milk-based drinks in a session, or want milk ready at the ideal temperature for frothing without repeated trips to the fridge, a milk cooling accessory keeps milk cold and within easy reach. It is a convenience and consistency tool rather than a strict requirement for every home barista.
Can I use a regular refrigerator instead of a milk cooler?
A refrigerator keeps milk cold, but it does not keep milk at the counter beside your espresso machine. Every time you steam milk you would need to open the fridge, pour, and return the carton, which slows your workflow and exposes milk to room temperature. A milk cooling accessory is designed for countertop use, holding a small volume of milk at a stable cold temperature during a brewing session. For occasional single drinks, the refrigerator is fine. For frequent or multiple drinks, a dedicated accessory is more practical.
How cold should milk be before frothing?
Cold milk froths more easily because the proteins and fats have more time to form structure before the milk heats up. Starting with milk straight from the refrigerator, rather than milk that has been sitting out, gives you better foam volume and a smoother microfoam texture. A milk cooling accessory helps maintain that cold starting temperature across multiple pitchers, so your second and third drinks froth as well as the first.
How do you clean a milk cooling accessory?
Most milk cooling accessories have a removable milk container and a separate cooling element. After each use, empty any leftover milk, rinse the container with warm water, and wash it with mild dish soap. The cooling element usually only needs a wipe with a damp cloth. Check the manufacturer's instructions for whether parts are dishwasher safe. Cleaning after every session prevents milk residue from affecting flavor and keeps the accessory ready for the next use.