 how-to
How to Get Better Crema from Super Automatic Espresso
Table of Contents
- What You'll Need Before You Start
- Step 1: Start With Fresh Beans for Better Crema
- Step 2: Adjust Grind Settings for Espresso on Your Super Automatic
- Step 3: Dial In Dose, Yield, and Water Temperature
- Step 4: Read Your Crema: A Visual Diagnostic Guide
- Step 5: Clean the Brew Group and Keep Your Machine Calibrated
- Common Mistakes That Kill Crema on Super Automatic Machines
- Frequently Asked Questions
Last Updated: September 26, 2026
What You'll Need Before You Start
Getting better crema from a super automatic comes down to four things: fresh beans, correct grind settings, proper dose and temperature, and a clean brew group. You do not need barista training, just know which variables your machine controls.
At Modesto & Associates, new owners often complain that their first shots look pale and thin next to a café's. The machine is rarely the problem; the setup usually is.
Here is what to have ready before you start:
- Fresh coffee beans (roasted within the last 2-4 weeks)
- A small scale that measures to 0.1 grams
- Your machine's manual (grind and temperature settings vary by model)
- A cleaning tablet and a descaling solution made for your machine
- A shot glass or small cup for checking yield
One note before you begin: crema is the layer of foam on top of an espresso shot. It forms when pressurized water pushes carbon dioxide out of the coffee grounds. Specialty Coffee Association's guide to espresso extraction explains the full process. The key point is simple. Crema comes from fresh beans, fine grinding, and steady pressure.
Step 1: Start With Fresh Beans for Better Crema
Fresh beans matter more than any machine setting. Most thin crema problems start with stale coffee, not a badly tuned machine. But "fresh" is only half the story, the other half is the roast profile.
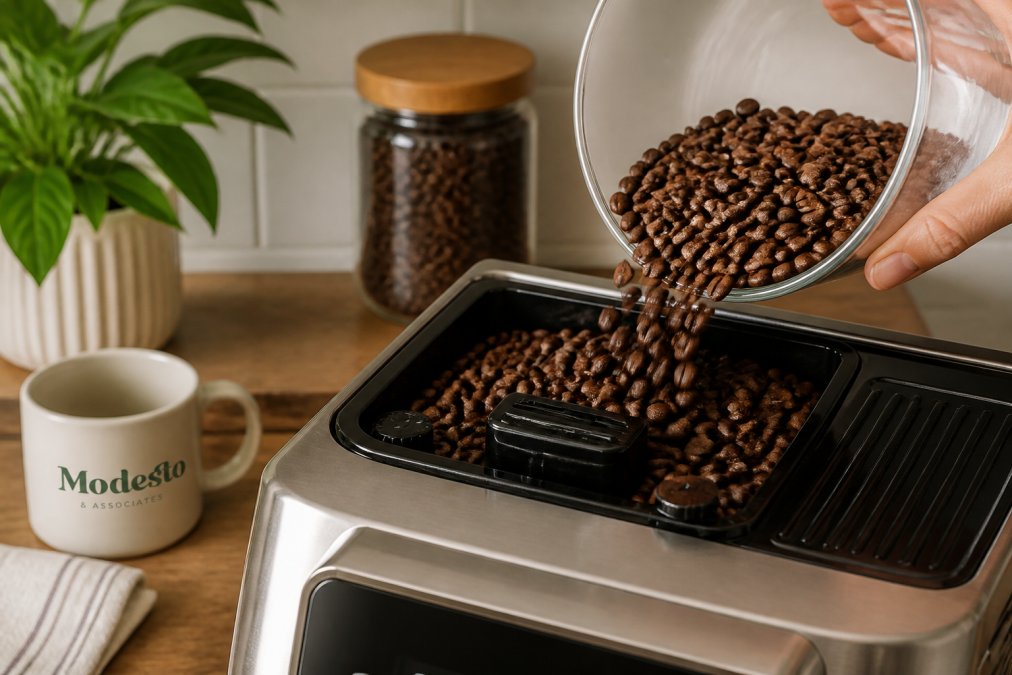
Coffee releases carbon dioxide for a few weeks after roasting, and that gas builds crema. Old beans have already lost it, so no grind adjustment will bring the foam back. Choose beans roasted within the last 2-4 weeks and store them airtight, away from light and heat.
Why roast level changes crema volume
Roast level determines how much CO2 is trapped in the bean and how much oil sits on the surface. Both drive foam formation, but they pull in opposite directions as the roast darkens.
- Light roasts retain the most CO2 but carry very little surface oil, so crema forms quickly and collapses. They are also denser, resisting water flow and pushing extraction toward sour, under-developed shots unless you grind finer and raise the temperature.
- Medium roasts sit in the sweet spot for most super automatics: enough CO2 for stable foam, enough oil for body, and predictable extraction across the narrow temperature range home machines hold.
- Dark roasts carry the most surface oil, producing thick, dark, almost syrupy crema. The trade-off is CO2: much of the gas escapes in the roaster, so dark-roast crema looks impressive but fades faster than medium, and the beans stale quicker as the oils oxidize.
A practical rule: for maximum crema volume, start with a medium roast. For maximum thickness and don't mind fading, go dark. For light roasts, expect to grind finer and accept a thinner, faster-fading layer.
Match the bean to the machine, not the other way around
Super automatics have a narrower grind and temperature window than manual setups. A very light, dense bean may sit outside it entirely, which is why some owners find a specific bag will not produce crema no matter what they change. Before blaming the machine, try a medium or medium-dark espresso blend; if crema improves immediately, the bean was the constraint.
Step 2: Adjust Grind Settings for Espresso on Your Super Automatic
Adjusting grind settings for espresso is the single most effective fix for weak crema. On most super automatics, you change the grind while the burrs run.
Here is the sequence:
- Pull a shot and note how fast it pours.
- Turn the grind dial one step finer.
- Pull another shot.
- Repeat until the shot slows down.
Step 3: Dial In Dose, Yield, and Water Temperature
Water temperature, dose, and yield decide how much crema you get, and small changes make a visible difference. The problem is that most super automatics hide these controls, so owners never touch them. Here is what to change, how to reach the setting, and the water-chemistry variable most guides skip.
Dose and yield: the 1:2 starting point
- On several Jura models, temperature is adjusted through the product settings for each individual drink, not a global setting. You change it per beverage, then save.
- On De'Longhi machines, the temperature offset is often in a submenu under settings, and some models expose a pre-infusion toggle in the same area.
- On Philips and Saeco models, the temperature and pre-infusion settings are frequently locked behind a service menu accessed by a specific button combination during startup. The combination is model-specific, so check your manual before attempting it.
- On Miele and Bosch units, temperature is usually a global setting, but pre-infusion may be tied to the coffee profile rather than a standalone control.
Pre-infusion: the setting that stabilizes crema
Water chemistry: the variable nobody talks about
- Too soft (very low TDS): the water lacks minerals that extract oils and stabilize bubbles. Crema forms but dissipates quickly, and the shot tastes flat even when the grind is right.
- Too hard (high TDS): calcium and magnesium scale the boiler and group, reducing flow and eventually killing crema. Hard water also over-extracts, producing a dark, thin, bitter crema.
- The practical target: most espresso-focused water guidance lands in the 75-125 ppm TDS range for flavor, with alkalinity and hardness balanced so the water neither scales the machine nor tastes flat.
| Setting | Starting Point | If Crema Is Thin | If Shots Taste Bitter |
|---|---|---|---|
| Grind | Medium-fine | Go one step finer | Go one step coarser |
| Dose | 18 g | Increase slightly | Keep steady |
| Yield | 36 g | Reduce shot volume | Increase shot volume |
| Temperature | 200°F | Raise 2-3°F | Lower 2-3°F |
| Water TDS | 75-125 ppm | Check filter, test water | Check for scale |
Step 4: Read Your Crema: A Visual Diagnostic Guide
Your crema tells you what went wrong before you taste anything. Read the color and texture, and you can fix most problems in one or two shots.
Use this guide:
- Hazelnut brown, thick, holds together: the shot is dialed in.
- Pale yellow or white, thin: under-extraction. Grind finer or use fresher beans.
- Dark brown with a white center, thin: over-extraction. Grind coarser.
- Foamy and full of large bubbles: water temperature is too low, or the beans are stale.
- Almost no crema at all: check bean freshness first, then the grind.
Step 5: Clean the Brew Group and Keep Your Machine Calibrated
A dirty brew group ruins crema faster than any setting. Old oils go rancid, clog the screen, and block steady water flow.
- Rinse the brew group under warm water once a week.
- Run a cleaning tablet through the machine monthly.
- Descale on the schedule in your manual, usually every 2-3 months.
- Empty and rinse the drip tray and grounds bin daily.
Common Mistakes That Kill Crema on Super Automatic Machines
Other common errors:
- Using the wrong roast for espresso
- Never cleaning the brew group
- Letting the machine sit cold before pulling a shot
- Ignoring the water filter
If you want a machine that handles most of this for you, consumer reports on super automatic espresso machines notes that higher-end models offer wider grind ranges and steadier temperature control. That wider range makes dialing in crema much easier.
Frequently Asked Questions
How do I make my espresso have more crema?
Start with fresh beans roasted within the last 2-4 weeks, because CO2 release is what forms crema. Adjust your grind finer in small steps and keep your water temperature around 195-205°F. Also check that your machine's brew group is clean and your dose is consistent. If crema is still thin, try a darker roast or a blend with more robusta, which tends to produce thicker, more stable crema.
Why is my super automatic espresso machine producing pale crema?
Pale crema usually points to under-extraction. Common causes include a grind that is too coarse, water that is too cool, or beans that are stale. On super automatic machines, the grind setting may have drifted, so try moving it one or two steps finer. Also confirm your machine is reaching the correct brewing temperature and that you are not using old beans. A quick visual check of the crema color can guide your next adjustment.
Does bean freshness affect crema in automated machines?
Yes, bean freshness directly affects crema. Freshly roasted beans release carbon dioxide, which helps create and stabilize the crema layer. Beans roasted more than 4-6 weeks ago have lost much of that gas, so crema turns thin and disappears fast. For best results with super automatic machines, buy whole beans with a recent roast date and store them in an airtight container away from light and heat.
How does grind size impact crema on a super automatic?
Grind size controls how fast water flows through the coffee, which changes extraction and crema. Too coarse and water races through, leaving under-extracted, watery espresso with little crema. Too fine and the shot chokes, giving bitter, over-extracted coffee. On a super automatic, adjust the grind one step at a time while pulling shots, aiming for a flow that takes about 25-30 seconds for a 1-1.5 oz shot.